
The first time a student can't get their drone to arm is a make or break moment for any program. Like turning on a computer you built for the first time or launching a rocket it is when everything comes together. Handled well for kids, it becomes the teachable exchange that turns a frustrated kid into an engaged one. Handled badly, that student walks away thinking drone soccer is too difficult, complicated, or not for them. Multiply that moment by twenty students in a classroom, and a rough day can undo weeks of coaching, excitement, and confidence.
The good news is, 90% of arming failures come from the same short list of causes, and there is a predictable sequence that resolves them one by one. What follows is the exact procedure I use, the one I've refined across twelve years of building drones.
If you're a coach, teacher, or CTE instructor introducing drone soccer to a classroom, print this out, laminate it, put it on the wall next to the charging station, and walk your students through it until it becomes muscle memory.
Before you start: verify the Drone is bound
Every arming procedure assumes a bound drone. If you've flashed firmware, replaced a receiver, or swapped to a different radio and you're not certain the drone is connected, stop and confirm binding in Betaflight first. A drone that isn't bound will never arm no matter what you do at the field. Binding is a separate procedure, covered in my earlier article on ELRS binding.
(Connect to the drone to betaflight after binding and press the arm switch. You will see Aux 1 or Aux 4 move)
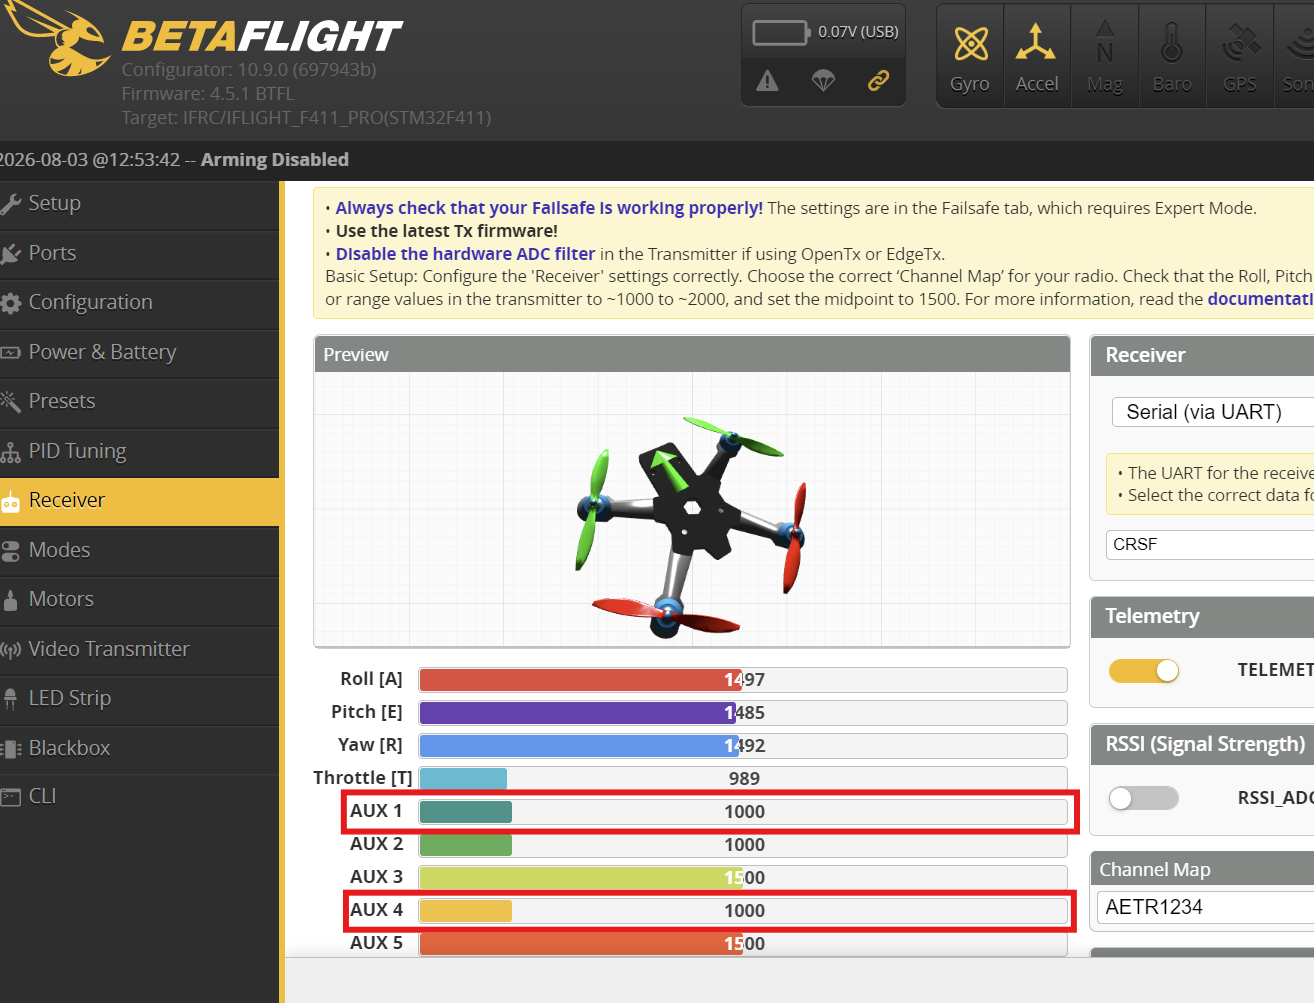
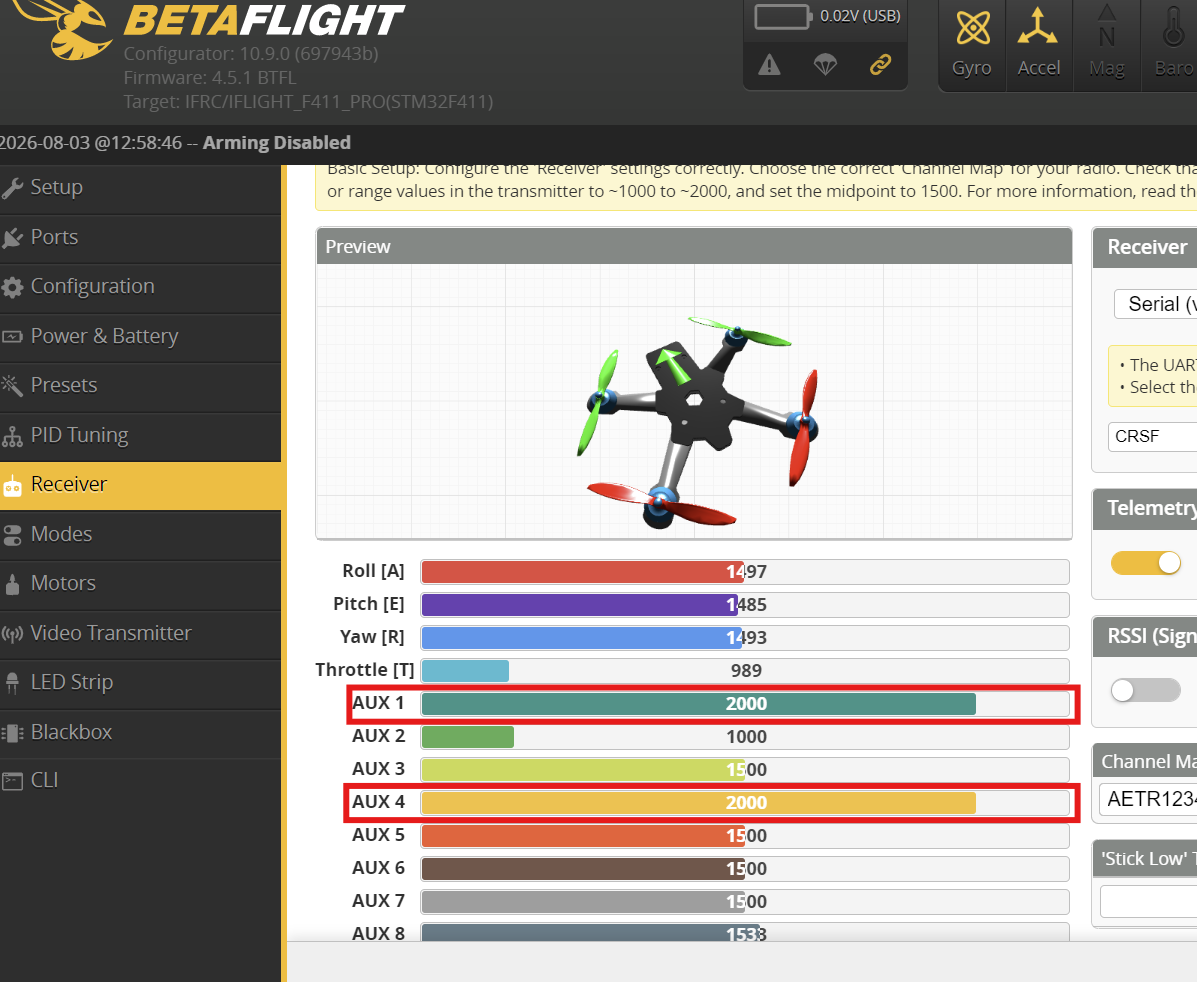
Assuming Betaflight shows a clean bind: the receiver tab reads live channel inputs when you move the sticks or, with the radio and drone on, you see a solid light on the receiver.
Before you start: Identify the Arm Button
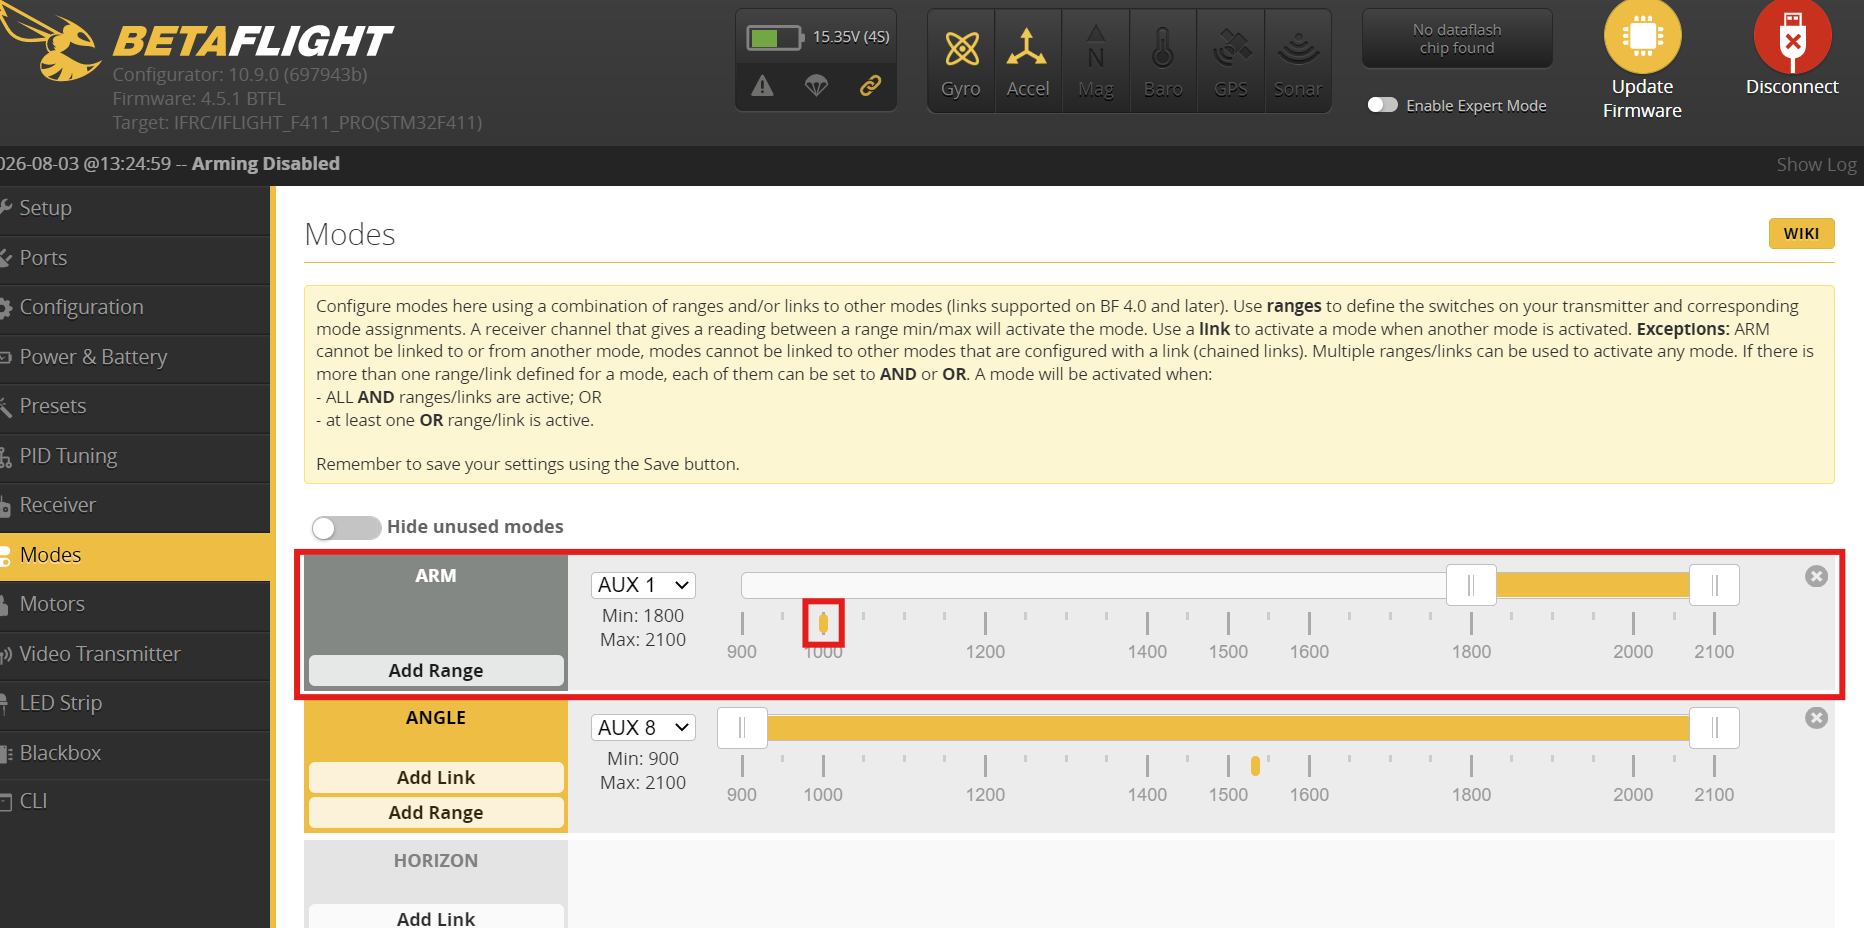
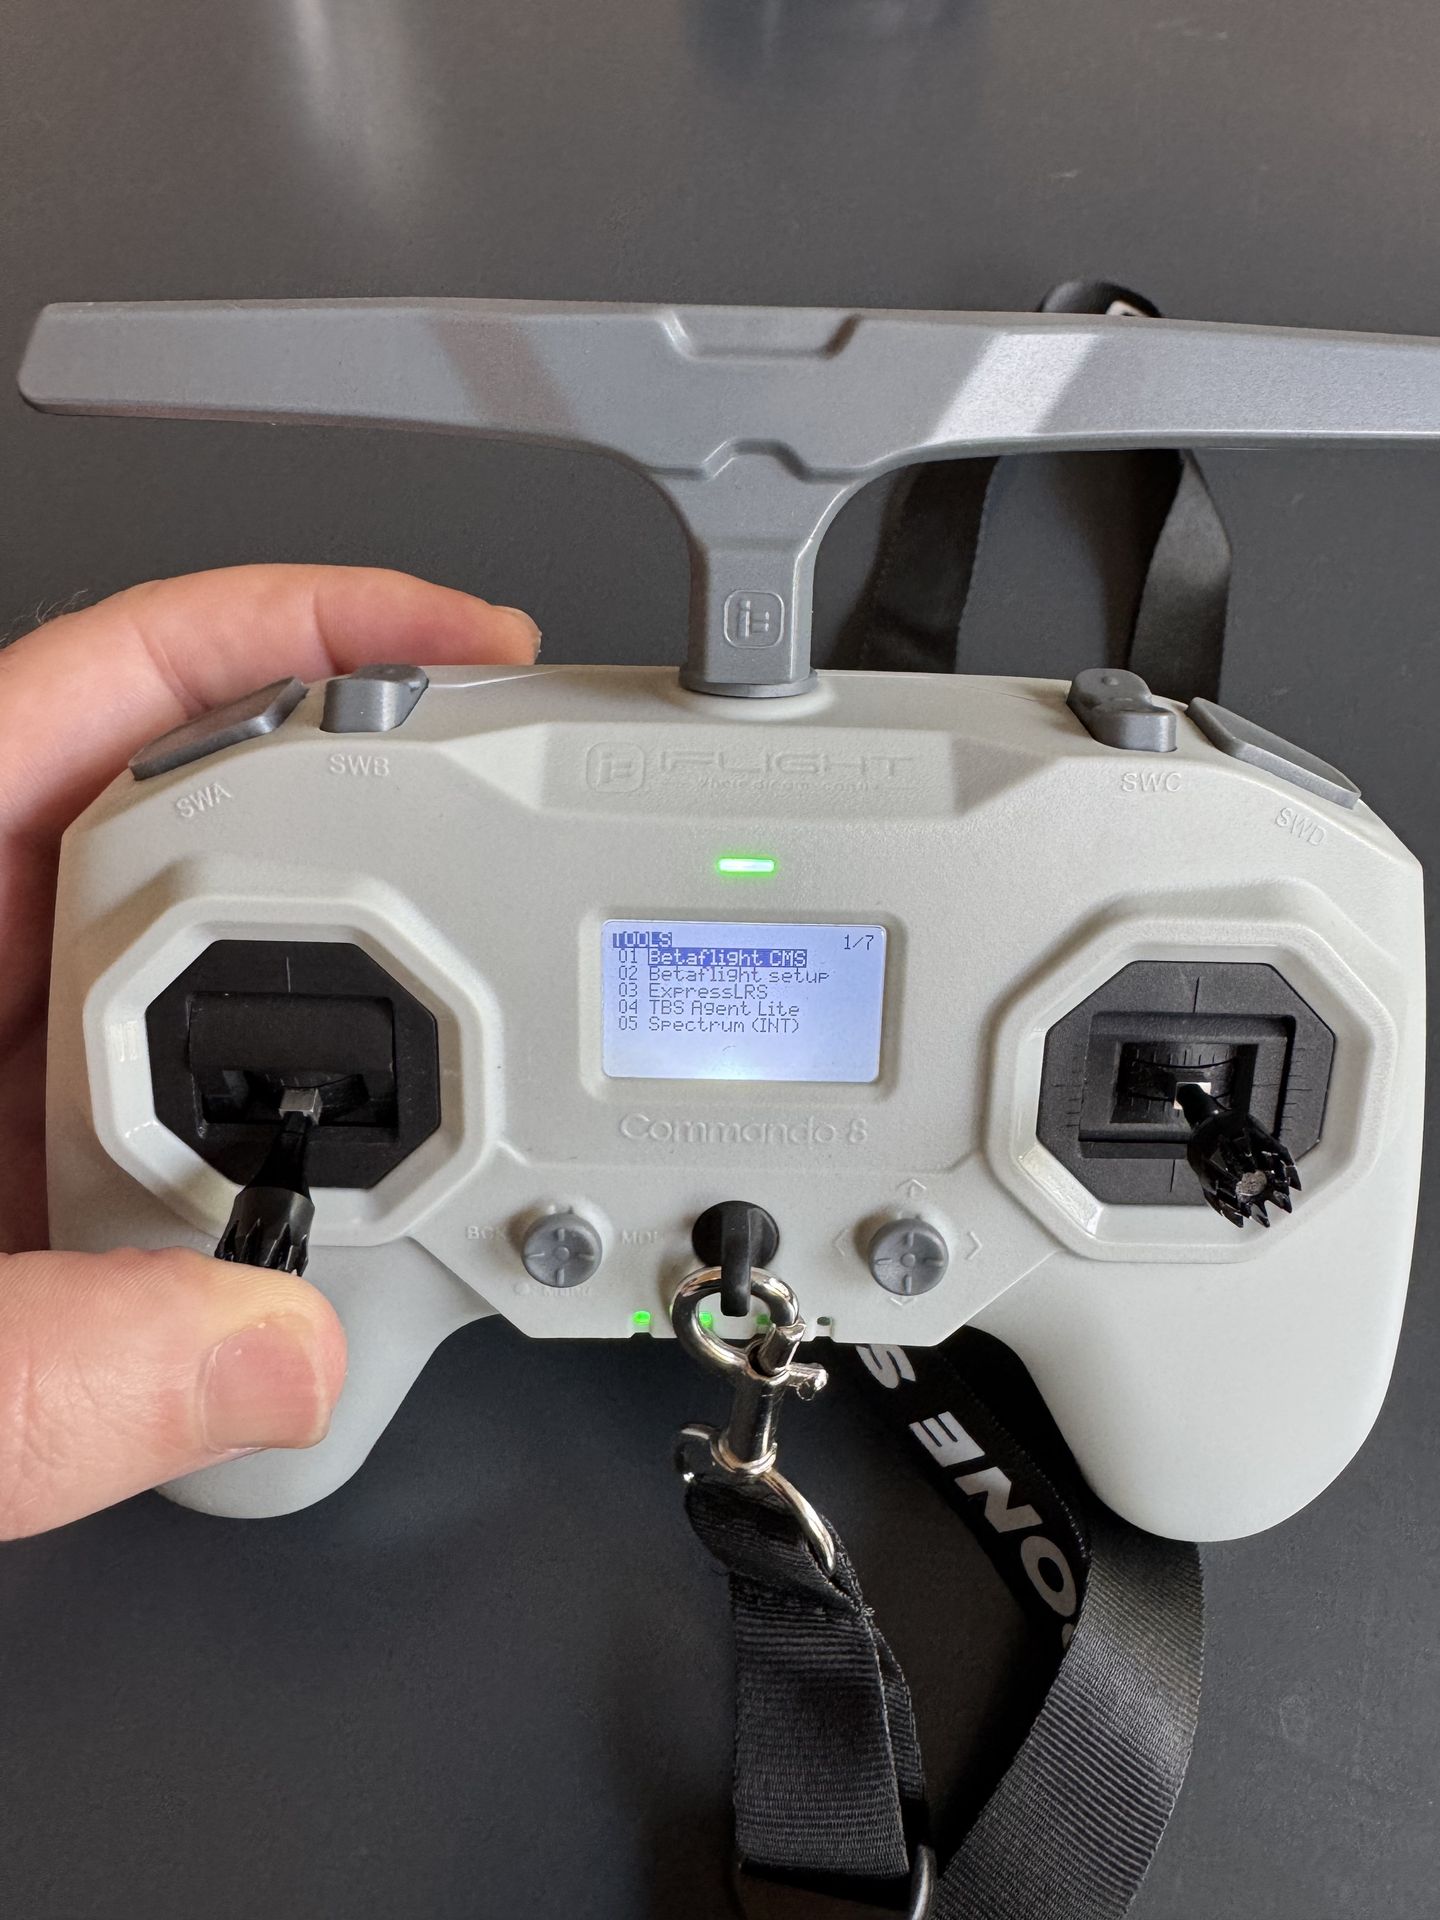
Once the drone is bound, this is easy to do. There are two identical buttons on the top of the Commando 8. One is "Arm" and the other is "Turtle Mode". With the drone connect and radio on, go into the "Modes" tab in Betaflight and at the top you will see "Arm".
Ensure the battery is not connected when testing. Click one of the two buttons to identify which one is Arm. (It is likely the left one.) The yellow tick mark will move indicating which button is arm. When the tick mark is in the yellow region it would arm if a battery was connected.
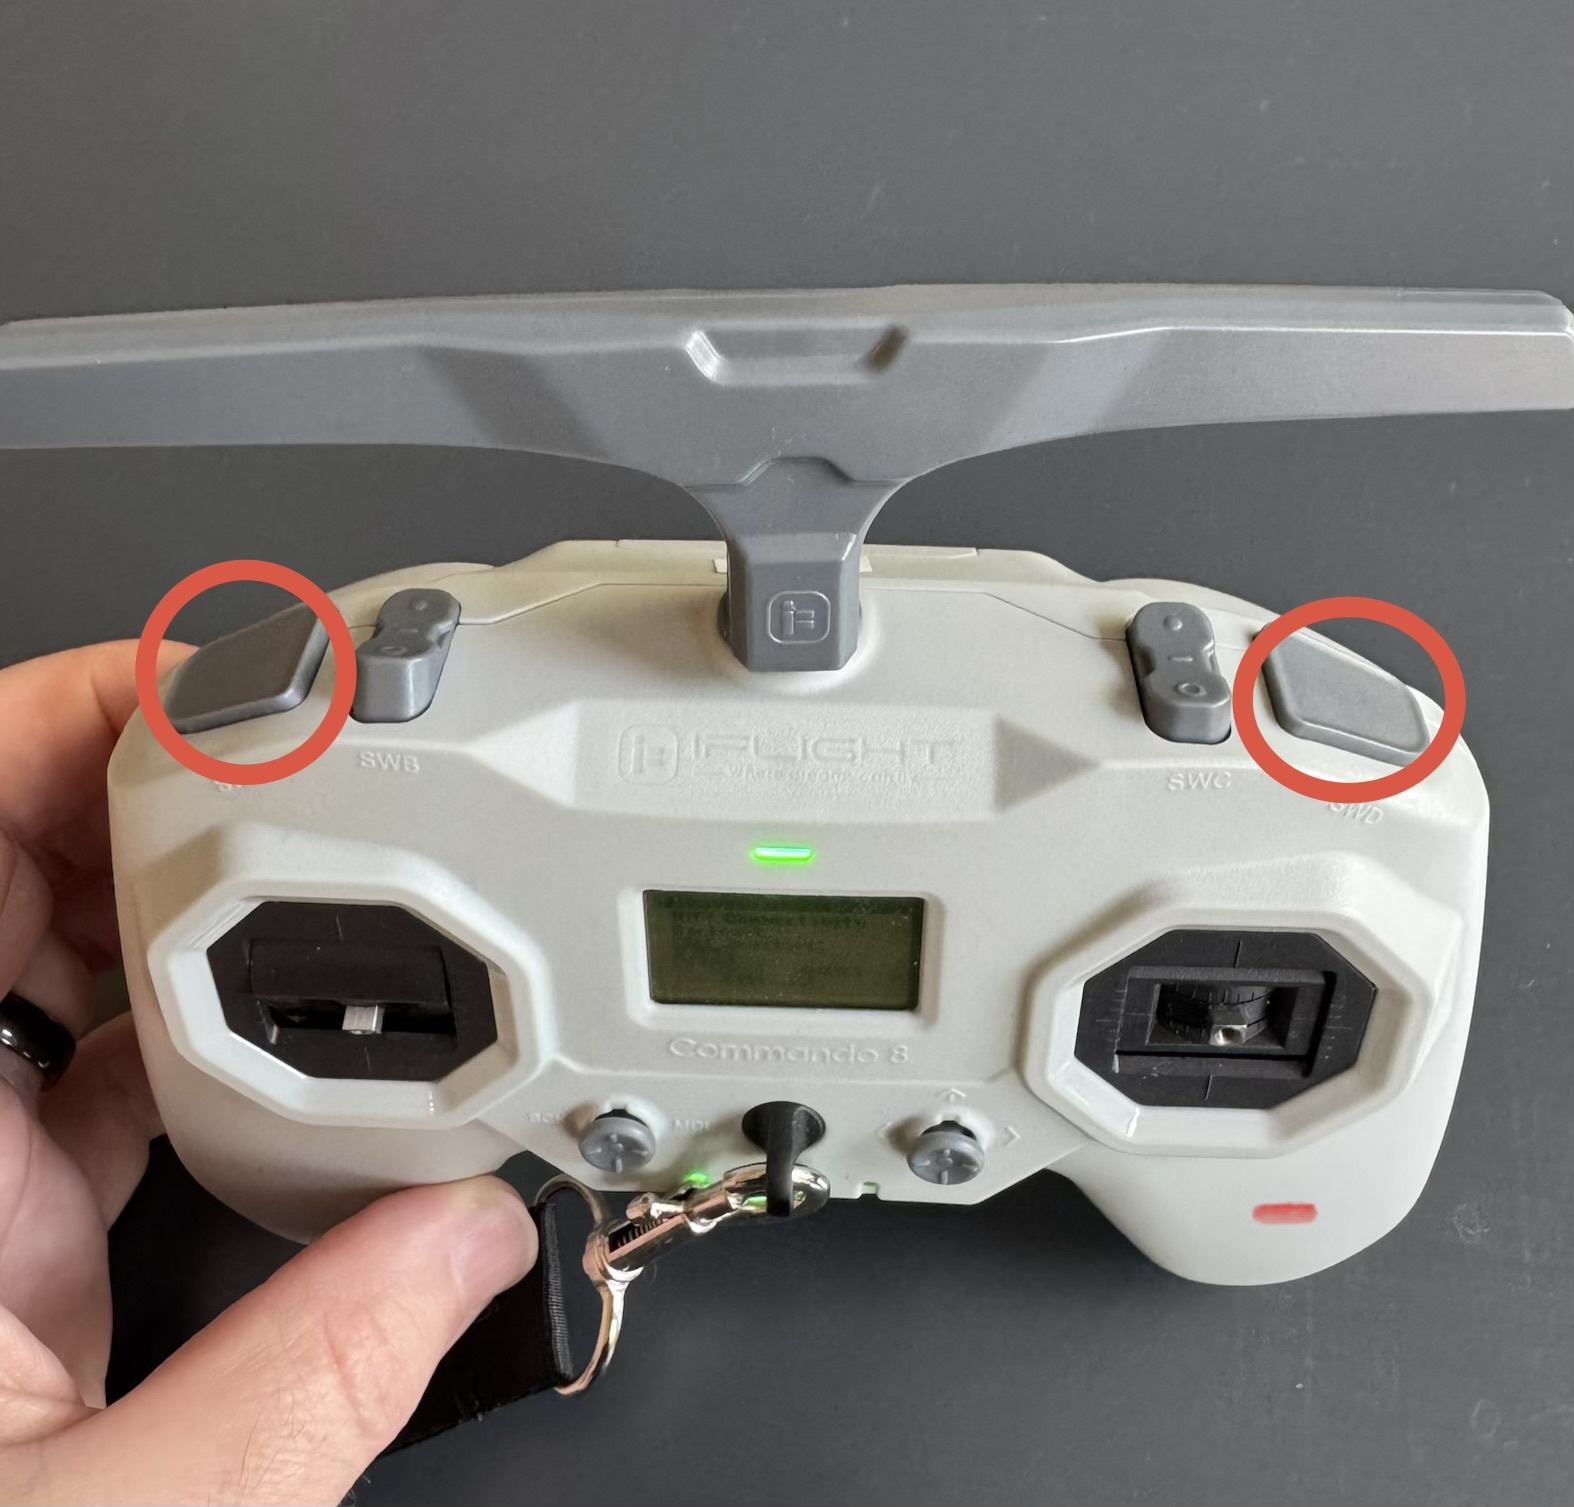
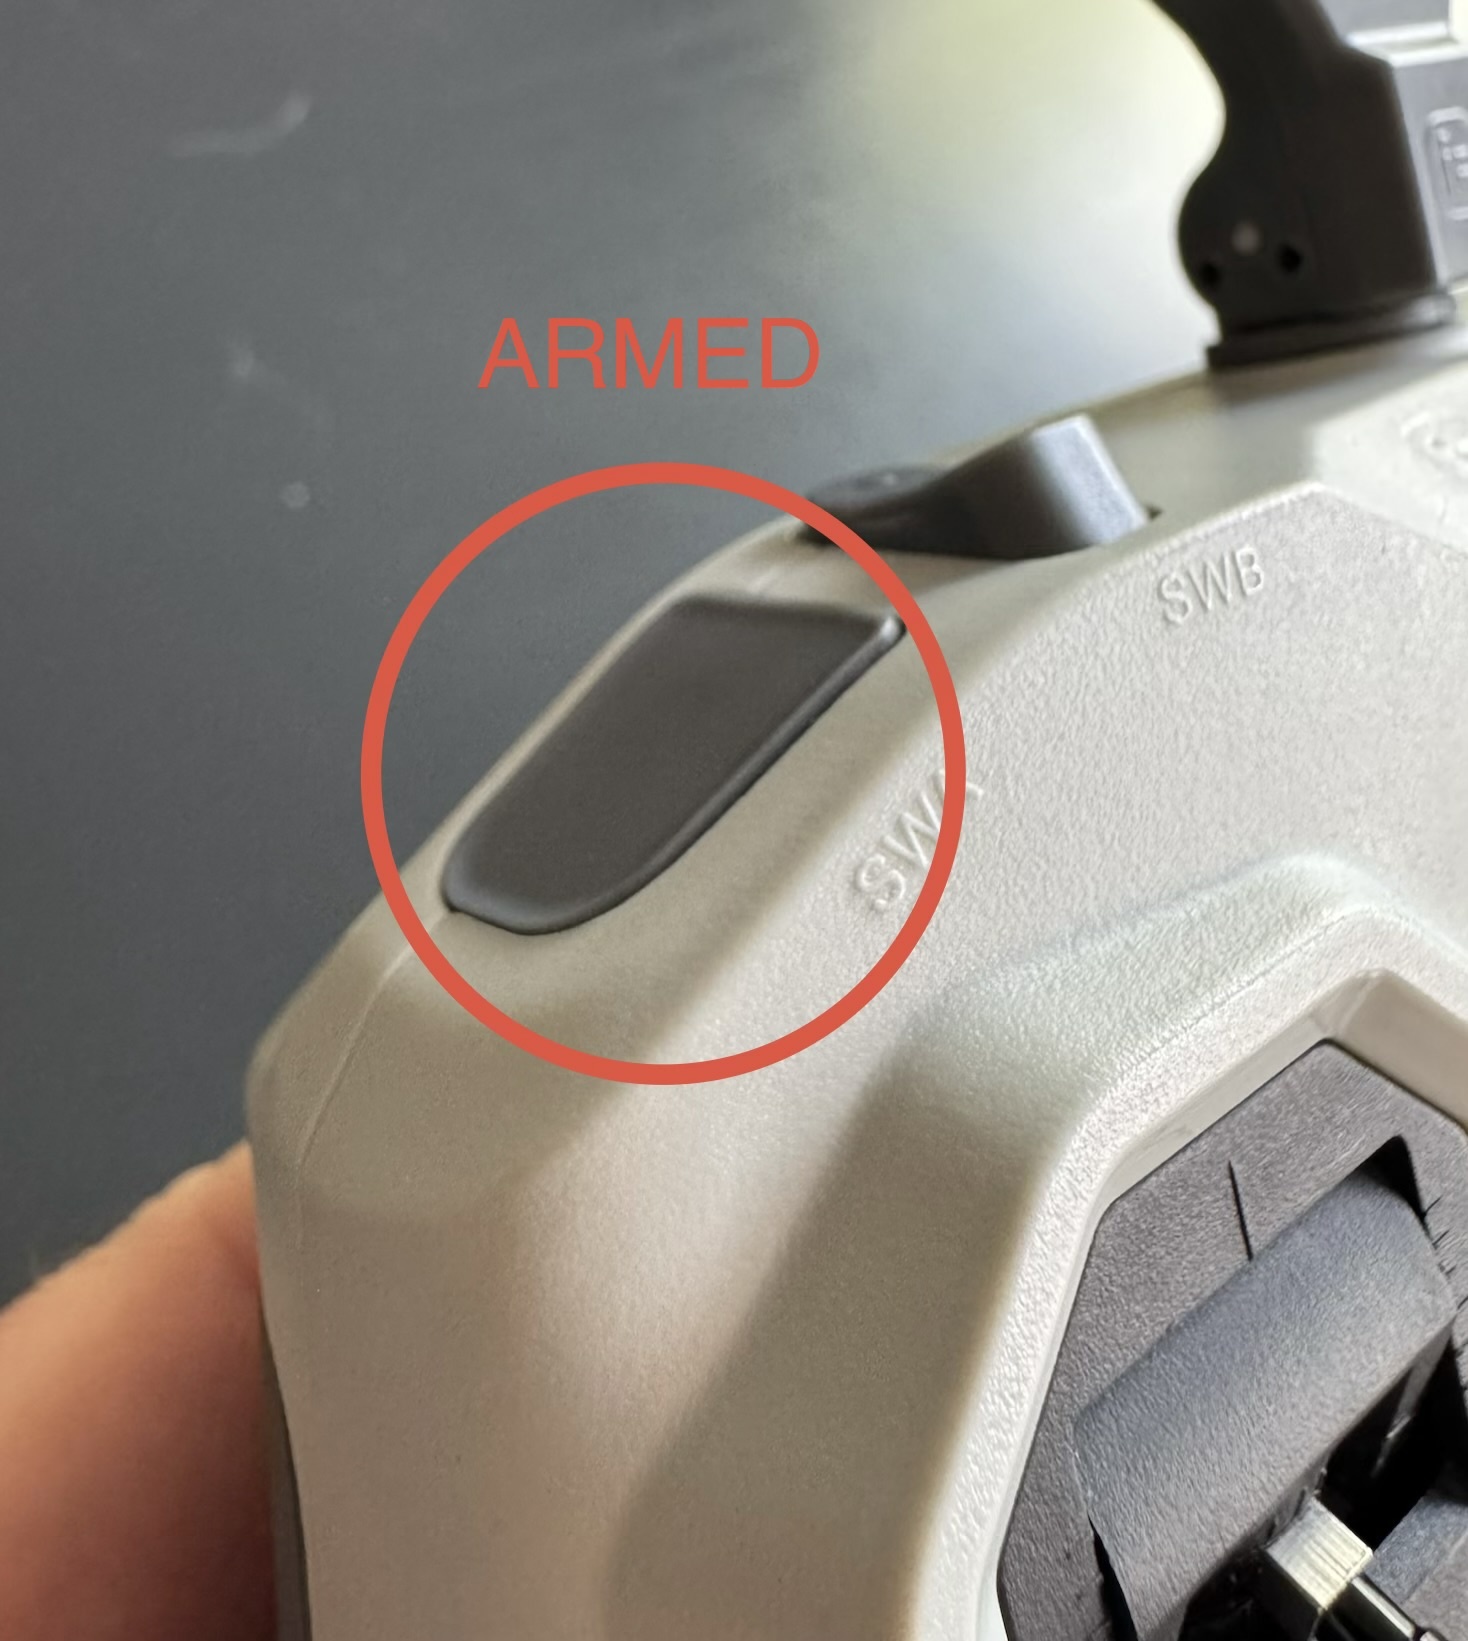
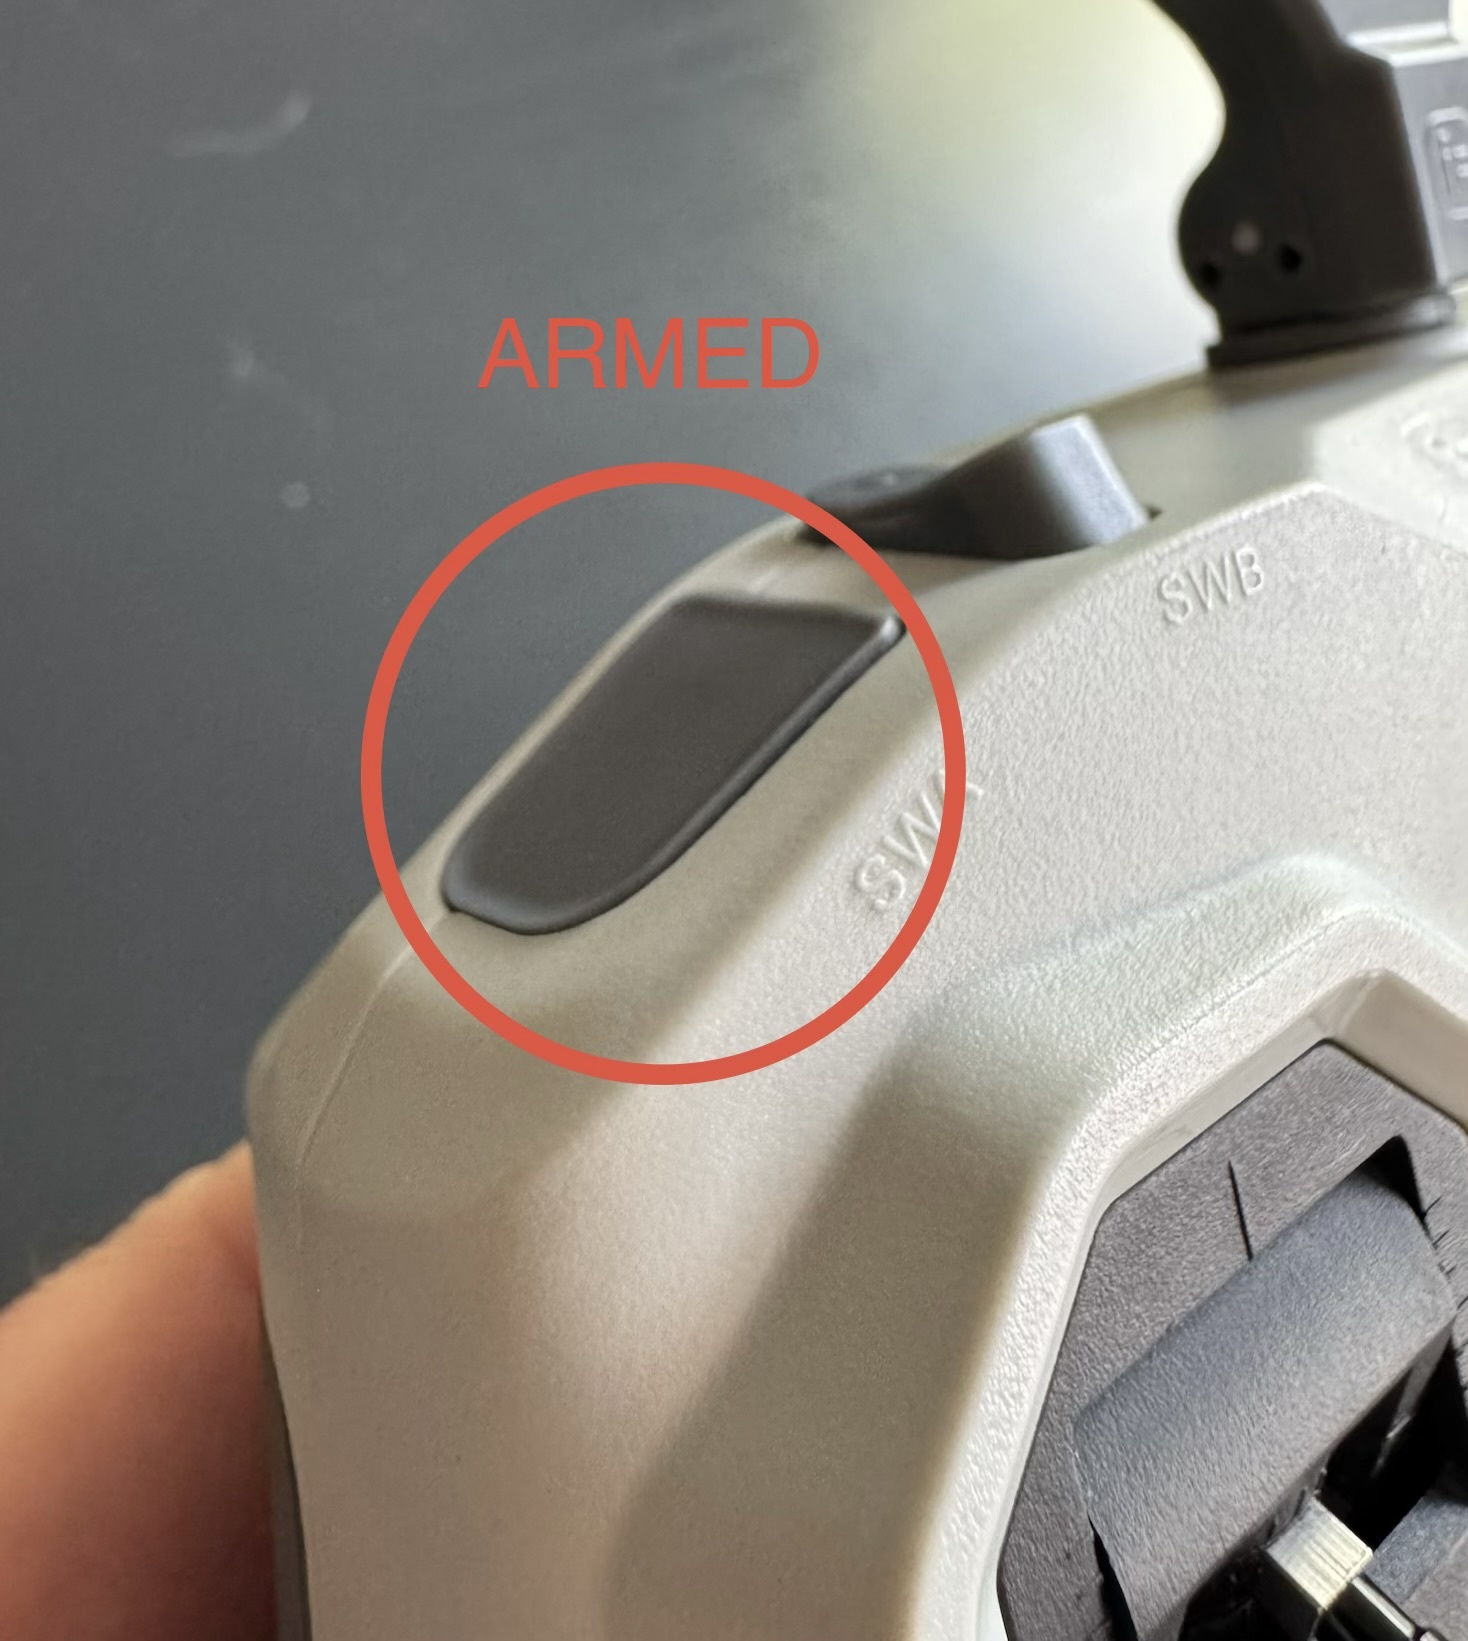
When the button is flush with the case, this is when the drone should be armed.
The arming sequence
Follow these five steps in order. Skipping a step or reversing the sequence is the single most common cause of arming failures in the classroom. Please ensure people and fingers are clear of the drone. The propellers are strong enough to cut fingers.
1. Power on the radio first. Always turn the transmitter on before you plug in the drone. This lets the receiver find a live signal at boot rather than searching for one that isn't there and then giving up. Then the bind may never happen or be significantly delayed. You have about a 30 second search window when the drone looks for the radio controller before it gives up.
2. Connect the battery to the drone. You'll hear the drone's startup tones and see the LEDs cycle through their initialization sequence.
3. Wait for a solid receiver light. Give it up to 30 seconds. The receiver LED will start out blinking or cycling, then settle into a solid color. Solid means "bound and connected to the radio." A blinking or unlit receiver light means the drone has not yet established a link or is not connected to the flight controller. Do not proceed until it's solid light.
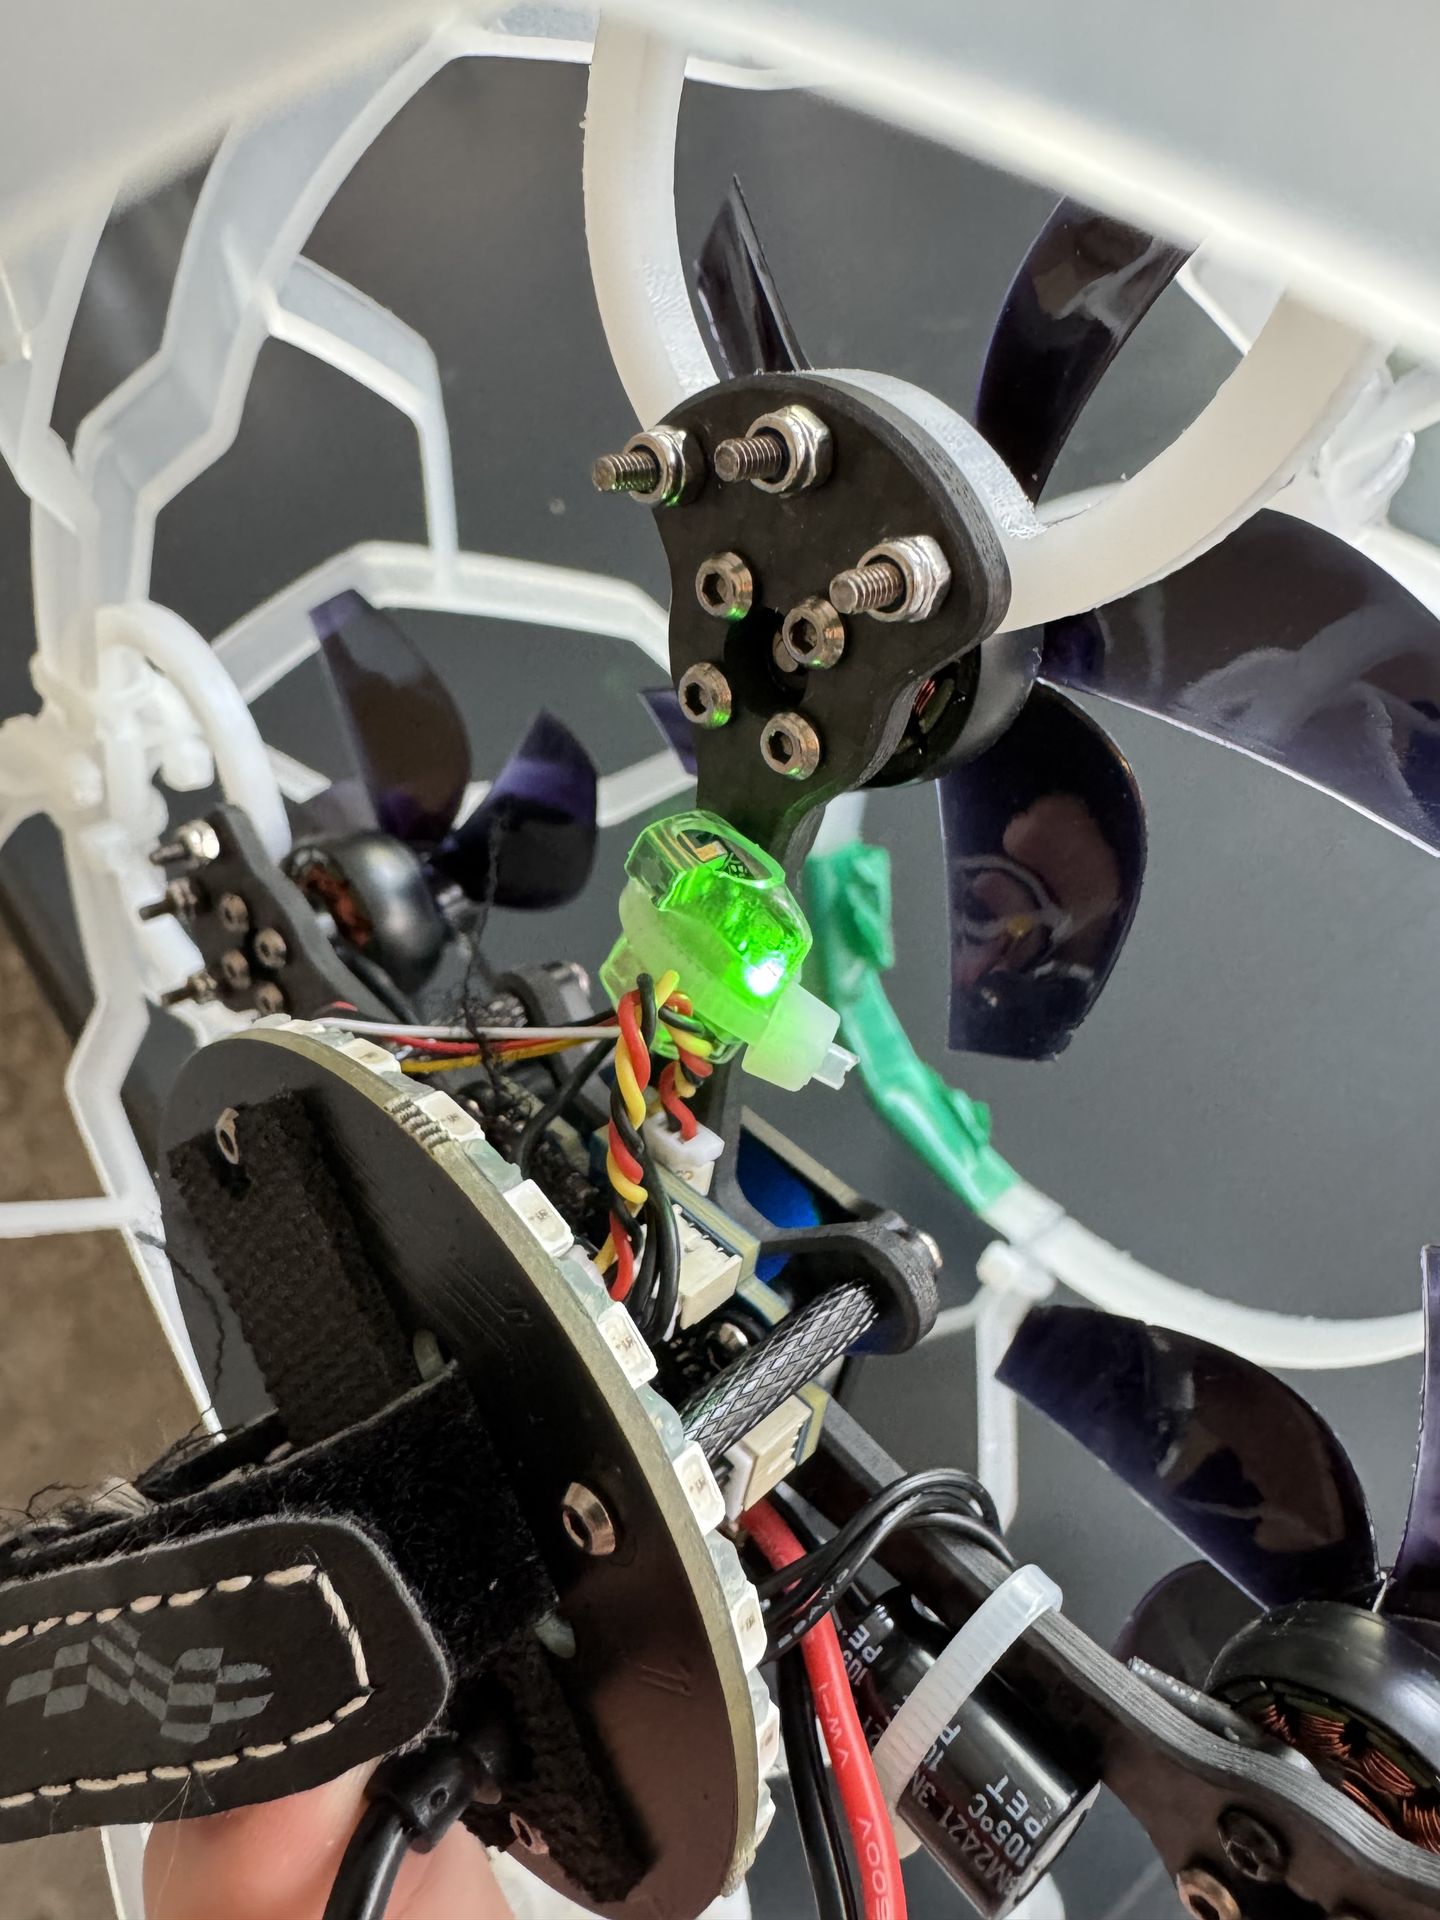
Tip: If you have the LEDs set, they will be random before it finds the controller then change to your selected colors once bound.
4. Set the drone down and confirm throttle is fully down on the radio (left stick). Betaflight will refuse to arm if it detects any throttle input.
5. Press the arm switch once. The switch should sit flush with the top of the radio after you press it. The props should spin at idle. That's a successful arm and you are ready.
When the props don't spin: Troubleshooting
If step 5 doesn't produce spinning props, don't panic and don't start flashing firmware. Work through this checklist in order:
First: Cycle the arm switch a couple more times. Sometimes the switch position and the flight controller's interpretation of it get out of sync particularly after a fresh boot. Two or three cycles of the arm switch usually resolves it.
Second: check the turtle mode switch is not pressed. On the Commando 8 radio, the turtle mode switch is physically identical to the arm switch but on the other side of the radio from the arm switch. It's easy for a student, or an adult, to press turtle mode by accident. Turtle mode inhibits normal arming and will only let two propellers spin so it can flip over if upside down. Confirm the turtle mode switch is up (disengaged), then try arming again. Above we spoke about figuring out which button is the arm button. Turtle mode is simply the other button. Make sure it is not depressed and flush with the radio case.
Third: check the receiver light again. Is it still solid? Sometimes the radio and drone lose their link during setup, a battery cell went low, someone bumped the throttle. If the receiver light is now blinking, disconnect the drone battery, wait five seconds, and restart the sequence from step 1.
The bigger picture
Getting comfortable with the arming sequence is the first mechanical skill a drone soccer student masters, and it's the one that either builds or destroys their confidence in the sport. When arming works, students feel competent and in control. When arming fails and no one can explain why, students conclude they aren't cut out for aviation.
That conclusion is almost always wrong. Arming failures aren't a sign of a bad student or a broken drone. They're a sign that a five step procedure got compressed into a two-step attempt, or that a switch that lives next to the arm switch got pressed by accident. The procedure above is designed to catch both.
Print it. Laminate it. Practice it until your students can walk a new teammate through it themselves. That's when you'll know the program has taken root.
Eric Richard is President of Drone Sports, LLC and an 18-year U.S. Air Force veteran with 12+ years in the drone industry. Drone Sports is the official equipment provider of the U.S. Drone Soccer™ Association.